
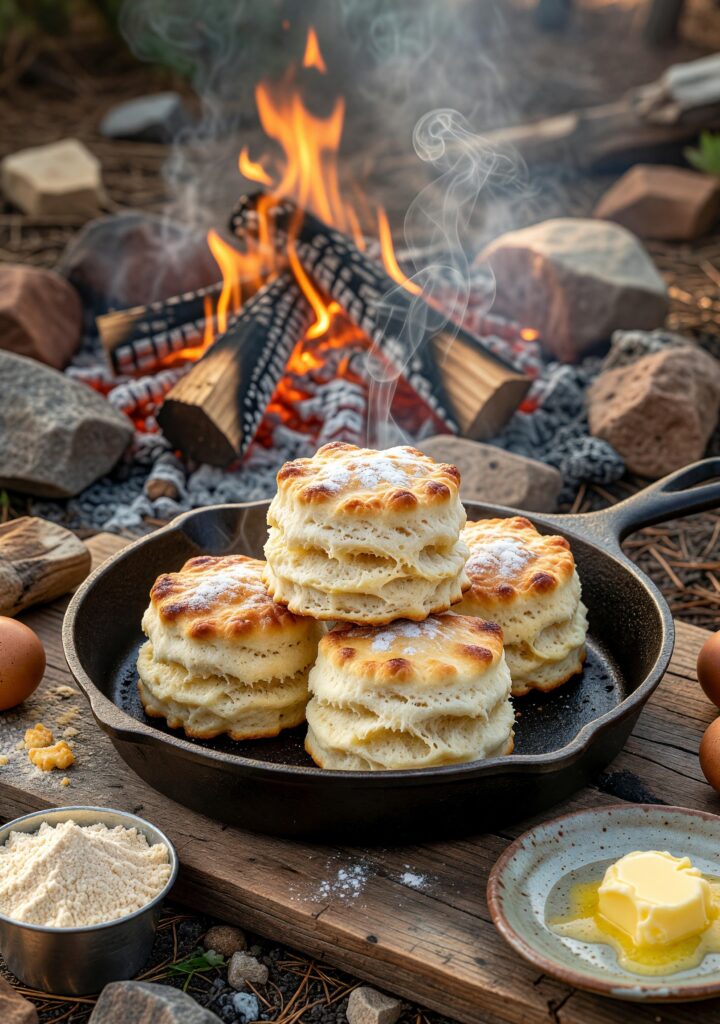
Imagine the sun dipping below the horizon, casting a golden glow over your campsite as the first stars peek through the canopy of ancient pines. The air is crisp, carrying the earthy scent of pine needles and the faint smokiness of your crackling campfire. You’ve spent the day hiking rugged trails, and now it’s time to unwind with a meal that warms both body and soul. That’s where cast iron biscuits come in—a timeless campfire classic that transforms simple ingredients into fluffy, golden delights right over the flames.
Why are these biscuits perfect for campfire cooking? For starters, they rely on the trusty cast iron skillet or Dutch oven, which distributes heat evenly and retains it like no other pan. No fancy oven needed—just a bed of glowing coals and a bit of patience. These biscuits are hearty enough to sop up gravy from your morning sausage or pair with fresh jam under the stars, adding that homemade touch to any outdoor feast. Field-tested on countless trips, they’ve saved many a rainy evening, turning potential meal mishaps into memorable stories. The magic happens as the dough rises gently in the heat, filling the air with a buttery, yeasty aroma that draws everyone to the fire. Crispy on the outside, tender within, each bite evokes the simple joys of wilderness living. Whether you’re a solo adventurer or sharing with a group, these biscuits build camaraderie and satisfaction. Get ready to elevate your campfire cuisine—your taste buds are in for a treat that captures the essence of the great outdoors.
Recipe Overview
Prep Time: 10 minutes
Cook Time: 15-20 minutes
Servings: 6-8 biscuits
Difficulty Level: Easy
Special Equipment Needed: Cast iron skillet or Dutch oven, campfire with a good bed of coals, tongs for handling hot cookware, and optionally a lid for the skillet to trap heat.
Ingredients List
- 2 cups all-purpose flour (use self-rising if available for easier rising in variable campfire heat)
- 1 tablespoon baking powder (aluminum-free for a cleaner taste)
- 1 teaspoon salt
- 1/3 cup cold butter or shortening (butter for richer flavor; shortening holds up better in cooler outdoor temps—cut into small cubes)
- 3/4 cup milk (whole milk for creaminess; substitute powdered milk mixed with water for backpacking adaptations)
- Optional: 1 tablespoon sugar for a touch of sweetness, or add-ins like grated cheese or herbs for savory twists
Step-by-Step Instructions
- Build your campfire and let it burn down to a steady bed of hot coals—aim for medium heat, about like a 375°F oven. Safety first: Keep a bucket of water nearby for emergencies, and use long tongs to handle the cast iron.
- In a bowl (or directly on a clean surface if packing light), whisk together the flour, baking powder, salt, and sugar if using. The dry mix should feel light and powdery, evoking that fresh-baked promise.
- Cut the cold butter or shortening into the dry ingredients using a fork or your fingers until it resembles coarse crumbs. Work quickly to keep it cold—the campfire’s ambient heat can melt it fast. You’ll get that flaky texture from these pea-sized bits.
- Pour in the milk and stir gently with a spoon or your hands just until the dough comes together—don’t overmix, or your biscuits will turn tough like old boot leather. The dough will be slightly sticky, perfect for rising over the flames.
- Turn the dough onto a floured surface (use a cutting board or even a flat rock in a pinch) and pat it to about 1/2-inch thick. Cut into rounds with a glass or knife—aim for 2-3 inches wide. Gather scraps and pat once more if needed.
- Grease your preheated cast iron skillet lightly with butter or oil using a paper towel on a stick. Place the biscuits in the skillet, sides touching for soft edges, and cover with a lid or foil tent to mimic an oven. Position over the coals, rotating the skillet every 5 minutes for even cooking. Bake for 15-20 minutes until golden brown and risen, with that irresistible buttery aroma wafting through camp.
- Remove from heat carefully—hot cast iron retains warmth! Let cool slightly before serving hot with butter, honey, or your favorite campfire toppings.
Key Takeaways
- Always prioritize safety: Never leave the fire unattended, and use oven mitts or folded cloths to handle scorching cast iron—burns are no joke in the wilderness.
- For best results, maintain even coals; too hot and biscuits burn on the bottom, too cool and they won’t rise properly—practice makes perfect.
- Variation idea: Add shredded cheddar or chopped bacon bits to the dough for cheesy, smoky campfire biscuits that pair great with eggs.
- If backpacking, pre-mix dry ingredients at home in a zip-top bag to save time and ensure consistency.
- Storage tip: Leftovers keep in a cloth wrap for up to 2 days; reheat over low coals or eat cold—they’re still delicious.
- Pro tip: The key to fluffiness is not overworking the dough; gentle handling preserves those air pockets for tender texture.
- Adapt for wind: Shield your cooking area with rocks or a windbreak to keep heat steady.
So, what are you waiting for? Dust off that cast iron, gather your crew, and fire up these biscuits on your next adventure. Your campfire meals will never be the same—happy cooking!